Deployment Methods
Deploy the QuantLayer agent in minutes on a single device or across an entire network segment—cloud, hybrid, or on‑prem (including restricted sites).
Overview
Deploy the QuantLayer agent in minutes—on a single endpoint, an OT server, or across an entire network segment. Enrollment supports cloud, hybrid, and on‑prem environments (including restricted sites where outbound internet access is unavailable).
- Single device enrollment
- Network discovery + auto-enroll
- IT / OT / IoT compatible
Method 1 — Deploy to a single device
Use Add Single Device to register one endpoint or server, then install the agent using the generated command. This is ideal for pilots, VIP assets, jump hosts, and OT engineering workstations.
Go to Infrastructure → Assets & Devices. Confirm the target device is Connected or ready to be enrolled.
This creates a Registered row for the device and generates an install command for your selected OS.
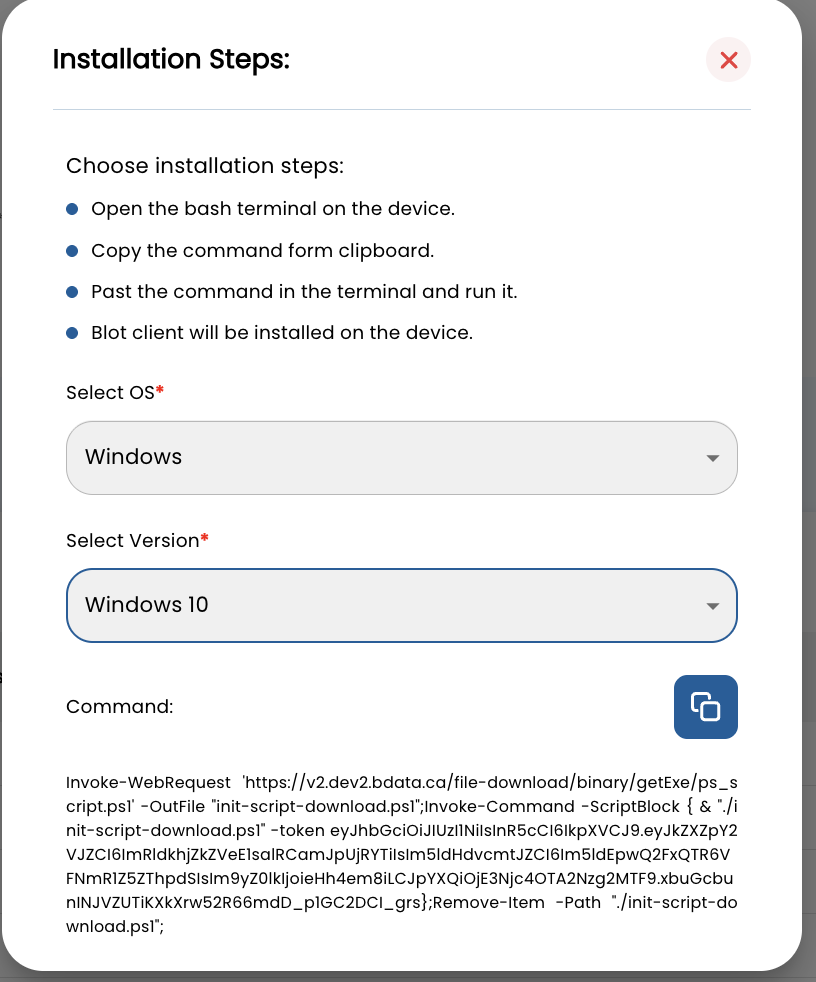
Choose Windows / Ubuntu / Debian and the version. Copy the generated install command.
Paste into PowerShell (Run as Administrator) and execute. The agent installs, registers, and begins reporting posture and events.
Back in the console, the device transitions from Registered → Connected. You can now open a remote console session (if enabled).
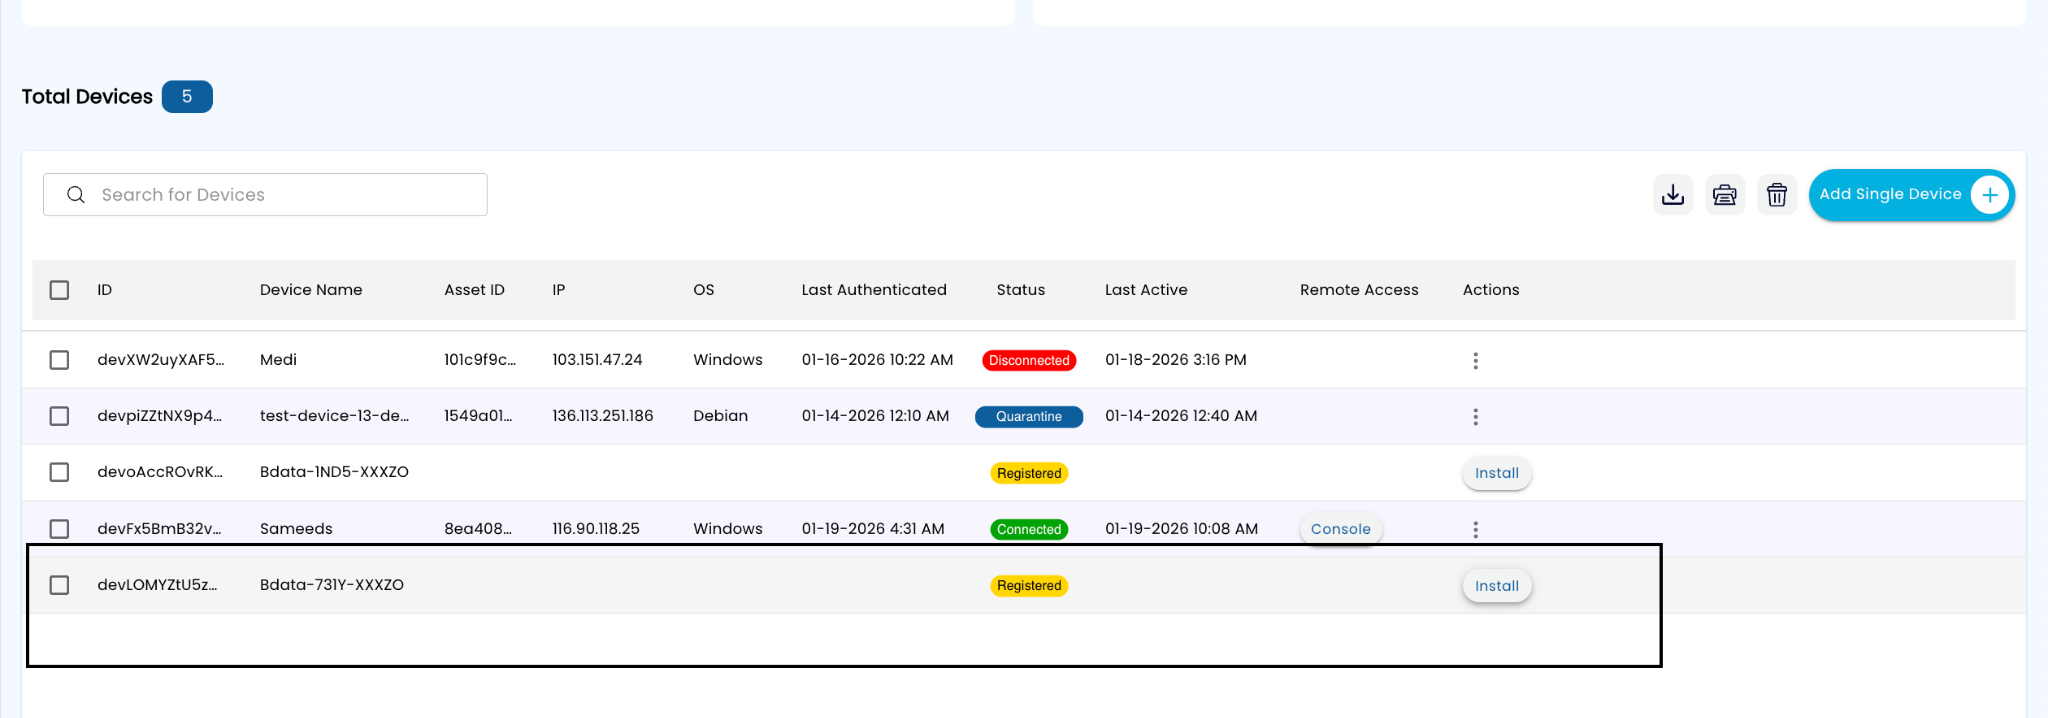
Add a single device, then click Install or Console from the device row.
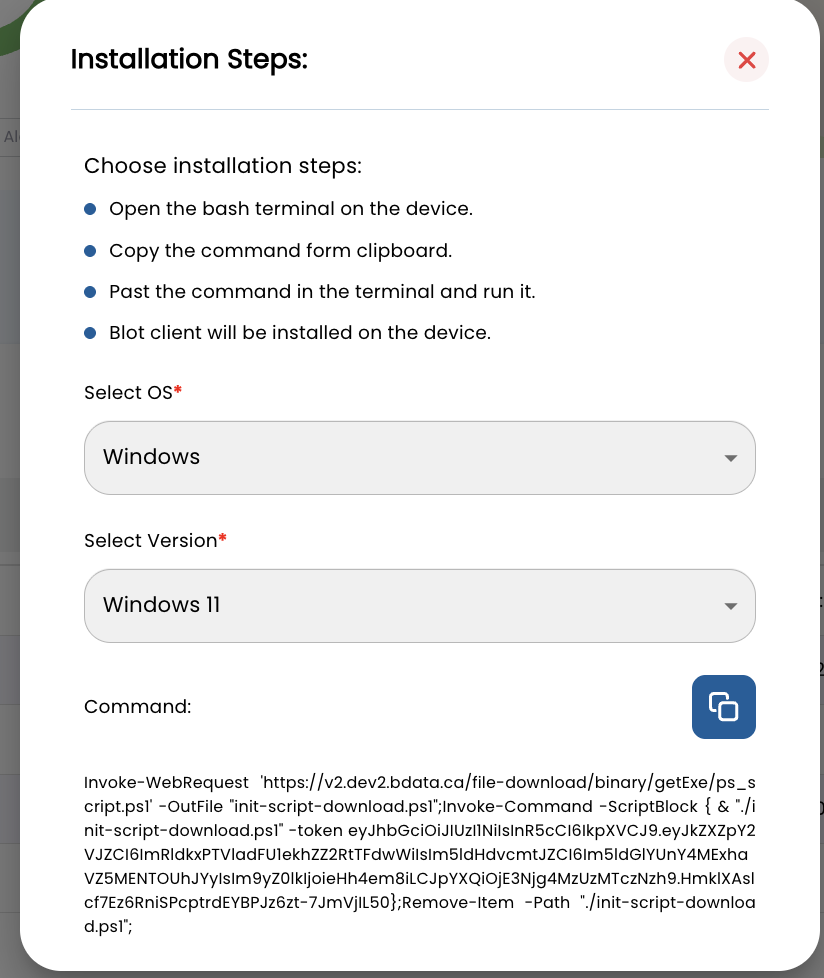
Select OS + version and copy the generated install command.

Run the command in PowerShell (Admin) on Windows or a shell on Linux.
Example install command (Windows PowerShell)
Invoke-WebRequest 'https://<your-console>/file-download/binary/getExe/ps_script.ps1' \
  -OutFile 'ql-init.ps1'

PowerShell -ExecutionPolicy Bypass -File .\ql-init.ps1 \
  -token '<ENROLLMENT_TOKEN>' \
  -server 'https://<your-console>'

# Cleanup
Remove-Item .\ql-init.ps1
Sample output (device response)
Downloading QuantLayer Agent... OK
Installing... OK
Registering device identity (HW-rooted)... OK
Device enrolled: devFx5BmB32v...
Policy sync: 12 policies applied
Patch inventory: 18 updates detected (2 critical)
Remediation status: Pending approvalMethod 2 — Deploy across an entire network
For fleet onboarding, use Network & Topology to discover devices and auto-enroll them using a designated server (or scanning host). This is ideal for OT zones, remote sites, branch networks, and IoT segments.
Go to Infrastructure → Network & Topology. Verify the server / scanning host is listed and named clearly (site + role).
Select OS + version for the scanning host. Copy the generated command and run it on the server to initiate discovery.
As endpoints are discovered, QuantLayer enrolls them based on your policy (auto-approve or staged approvals).
The Topology view renders servers and connected devices, making it easy to show segmented zones and device relationships.
Click Discover Devices to scan and enroll devices at scale.
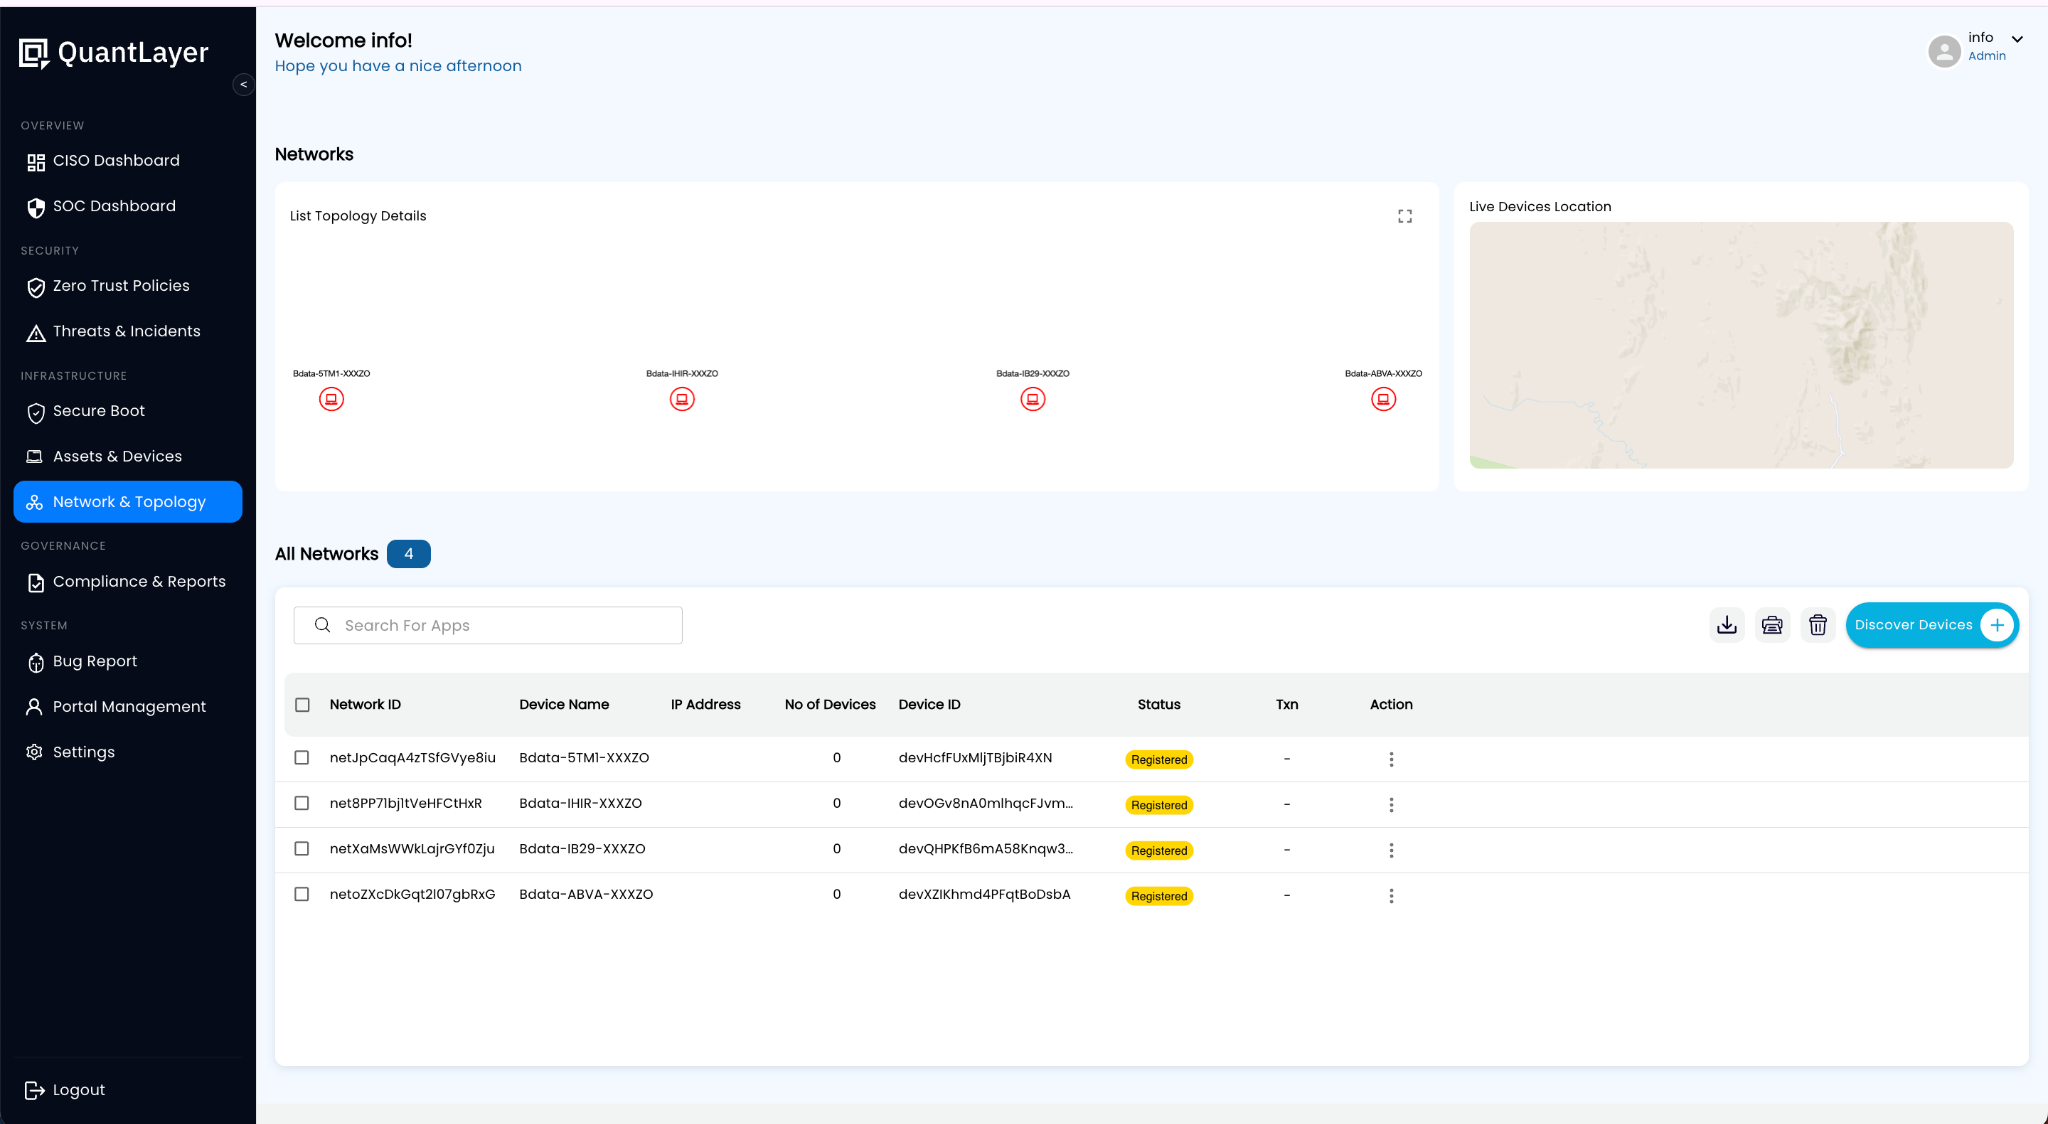
Manage scanning hosts, view details, and trigger installs.
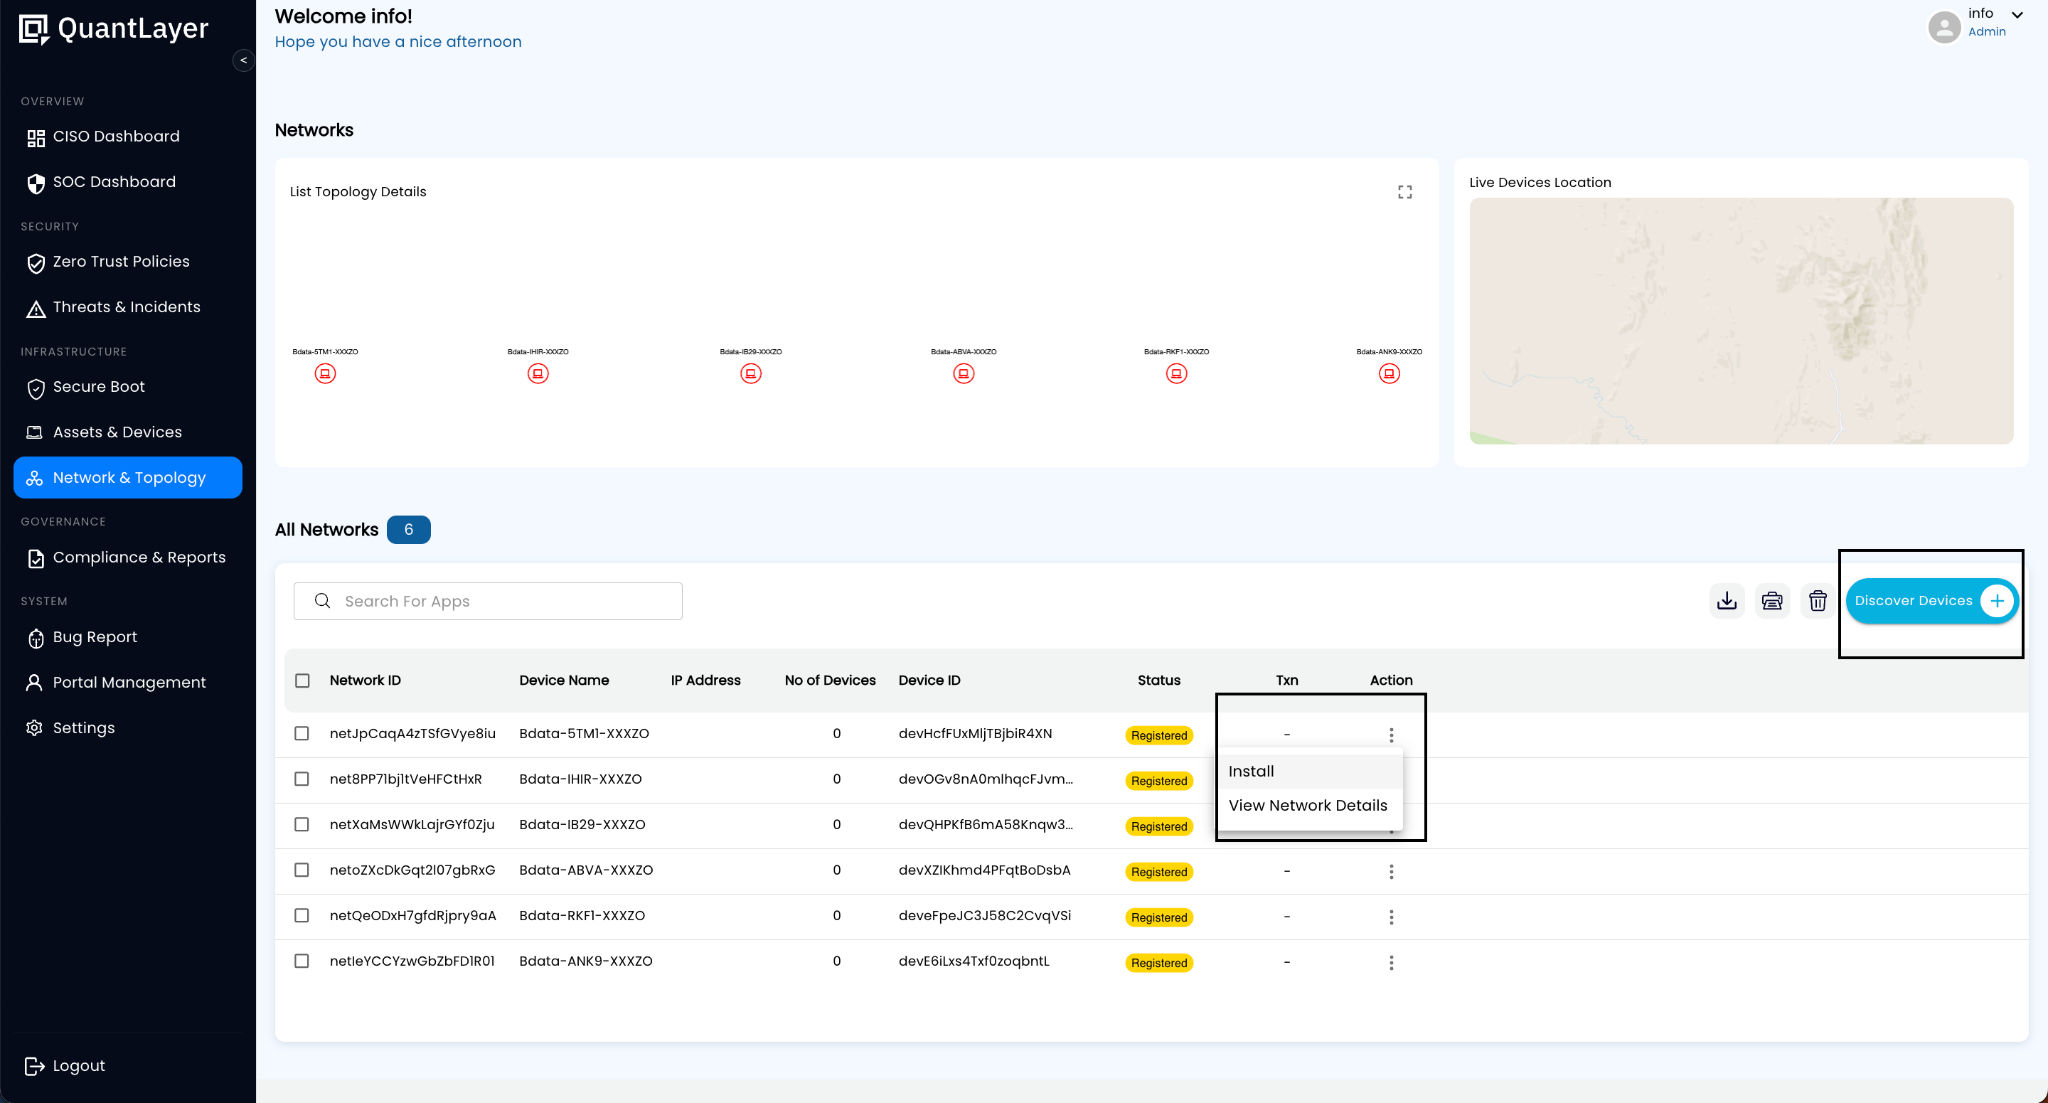
Show many devices connected via servers across a site/zone.
Example discovery command (Linux bash)
curl -fsSL "https://<your-console>/agents/ql-init.sh" -o ql-init.sh
chmod +x ql-init.sh
sudo ./ql-init.sh \
  --token "<ENROLLMENT_TOKEN>" \
  --mode "discover" \
  --subnet "10.10.0.0/16" \
  --site "PLANT1" --zone "OT"

# Expected: discovery started, devices queued for enrollment
Sample output
Discovery started: 10.10.0.0/16
Hosts found: 64
Eligible endpoints: 42
Auto-enroll: enabled (policy)
Topology graph: updating
Next sync: 60sWhat to show in a customer demo
Use this quick flow to make the value obvious to IT, OT, and operations stakeholders.
Add a device → install agent → status changes to Connected. Then show identity, posture, and policy sync.
Run a patch inventory command, show results in the console, then demonstrate staged remediation for OT maintenance windows.
Discover a network, auto-enroll devices, then show topology with servers and connected endpoints.
Explain deployment options based on site constraints (internet access, compliance, sovereignty, air‑gapped).